...but the bible says "Love your enemies" (Matthew 5:43–44)
So did the lower fairing finally fit? Of course not....at which point I loved my enemy very much.
I should have realised after faffing around with the radiator filler/air runner and water tank/dash/fairing brace debacles: packaging is critical. Giveaway #2 was the oil cooler shape: it’s actually tapered, to suit a very particular position in the "mouth" of the belly fairing:
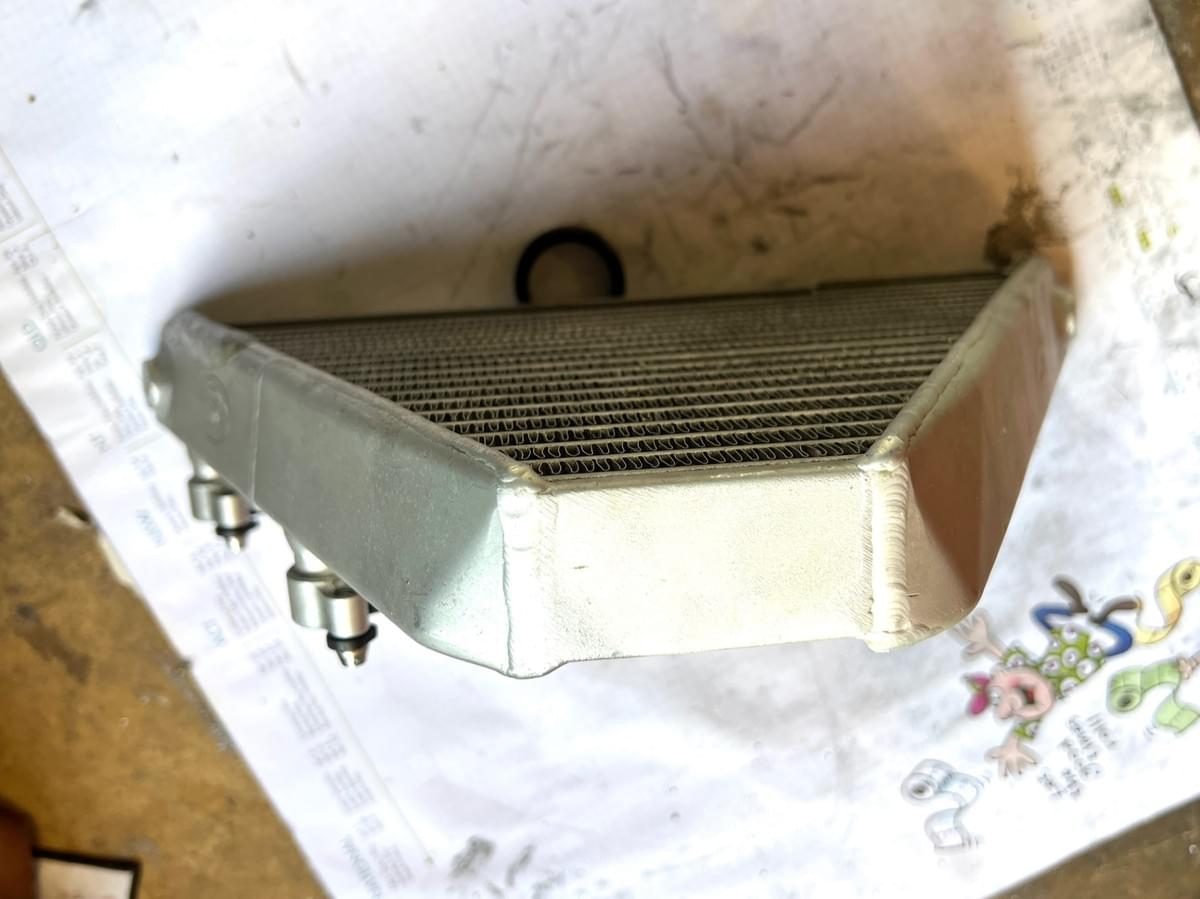
…and I had guess-timated the radiator and cooler into slightly the wrong position.
It’s actually easy enough to tilt the radiator/cooler backwards, it’s much more painful having to
shorten/remake the braided hoses and perform another "cut ‘n shut" operation on the carbon battery holder as a result of the reduced real estate available behind the rad/cooler. Just as well the thing has no starter motor, 'cos I forsee a scooter battery in its future (only has to run the ECU/dash and fuel pump for start-up).
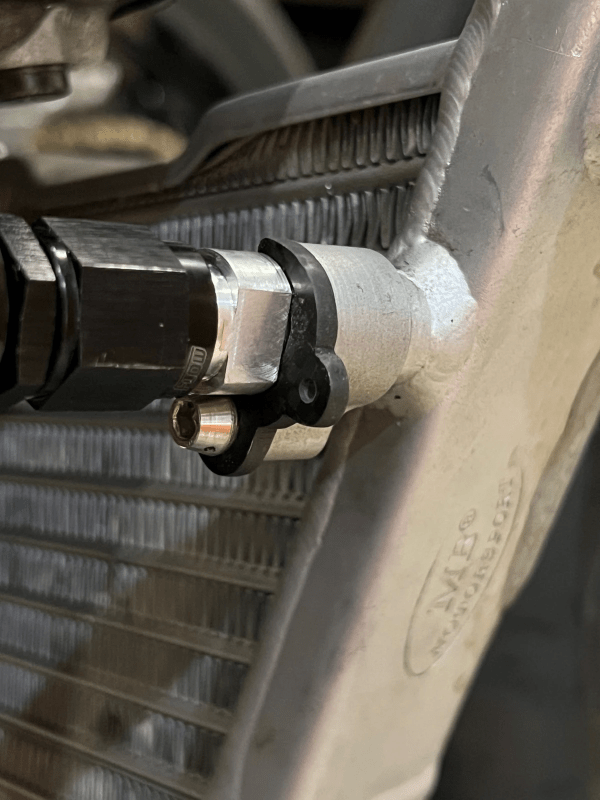
While I was also faffing around pinching a mm from the cooler mounting bolts, another mm from the anti-vibration mounts etc, (literally, the pre-preg F06 carbon fairings are incredibly stiff around the reinforced opening so there is no hope of flexing anything anywhere if it's even a fraction tight) I ticked the box for the cooler hose retaining clips. These are the lil' plates that slip into the groove machined into the push-fit O-ringed hose adapters, and when bolted to the cooler they lock the hose in place.
I'd seen the double clip for the crancase side of the hoses, but never the smaller single units for the cooler end. No bother, it's just a case of copying the LH side of the crankase twin hose retainer, which I already had:
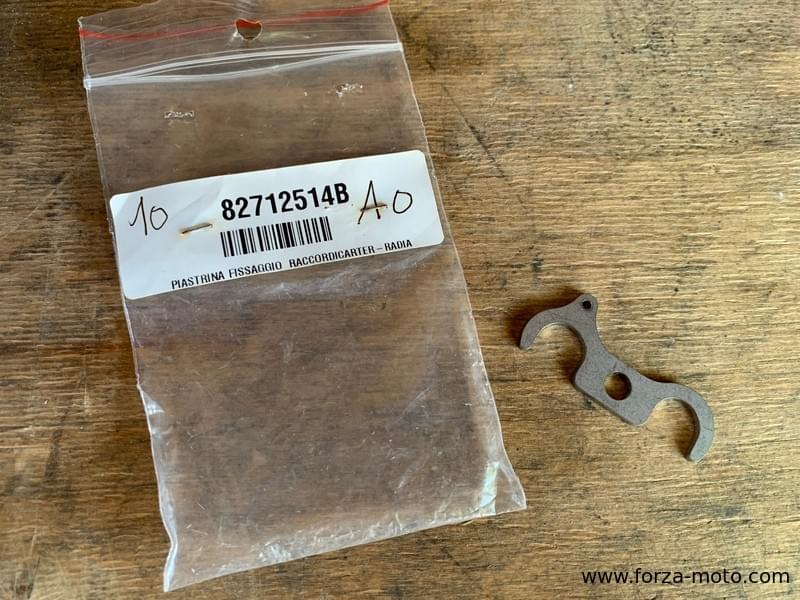
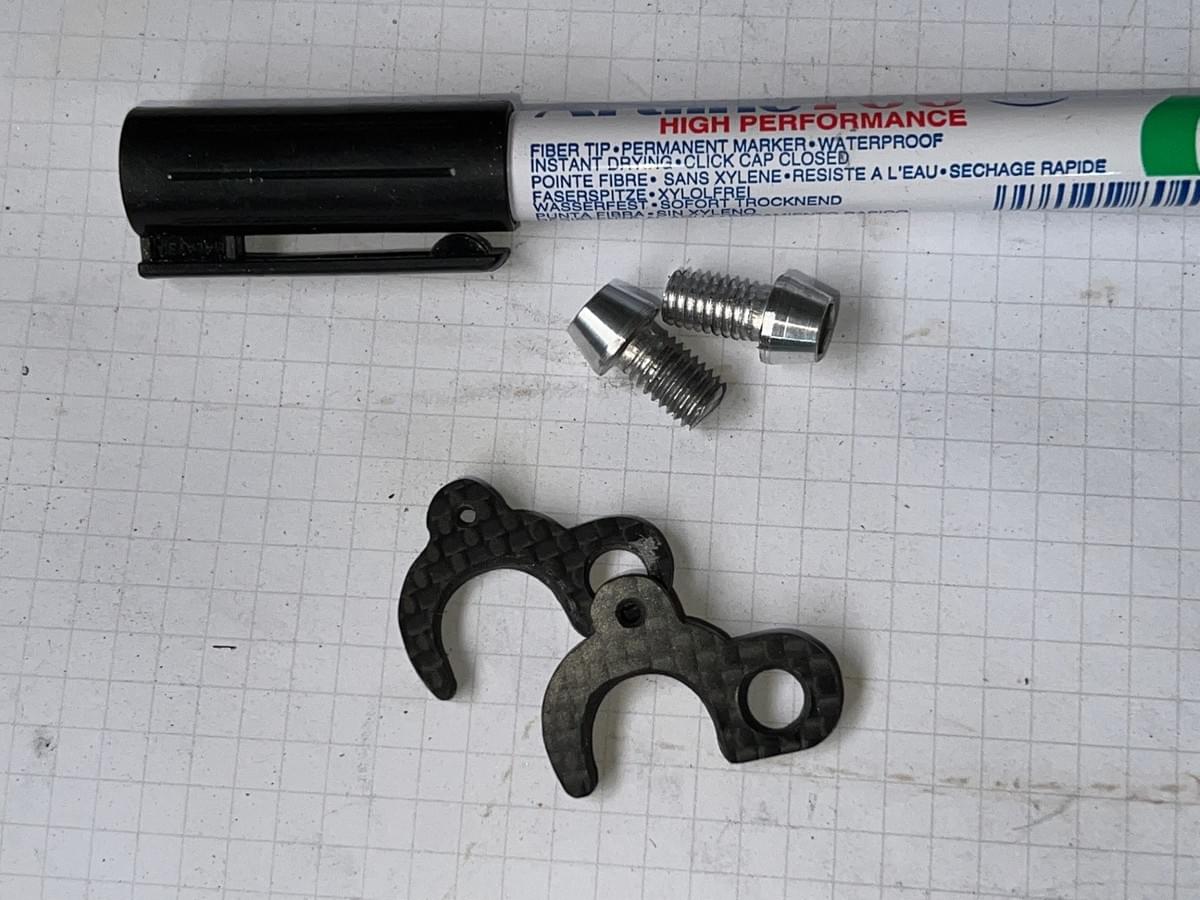
Except I didn't really have the appropriate stainless-steel material. I thought about alloy, which I either had in material too thin (which I wasn't very comfortable with) or too thick which would require machining....then I realised some 2.5mm pre-preg carbon plate I had on-hand was absolutely perfect for the 3mm slot. I umm'd and aah'd but realised the only thing holding me back was the fact it was "different", not worse. Realistically it's Chuck Norris tough = plenty strong enough for the application.
So here you go:
With that I offered up the belly pan again, wondering what the next issue issue would be...
...only to find myself holding the thing perfectly in position. (It doesn't escape me that I'm surprised when something does work out, but not when it doesn't)
I could offer a photo or two here but if that's the bikini bottom’s lookin’ pretty good it’s literally half-arsed if the bikini top doesn’t back it up.
I'm talkin' about the pachyderm in the room: that alloy tank.
I know it’s not everyone’s cup of Earl Grey, but I really like the "back to the '50's" hand crafted aspect of this thing. It’s obviously an alloy Tamburini 916 - 998 style tank, modified to suit the Terblanche 999. The fabricator has done a fine job roughing it out, but you get the feeling he/she has gone off for a liquid lunch to celebrate and missed an afternoon of finishing/finessing.
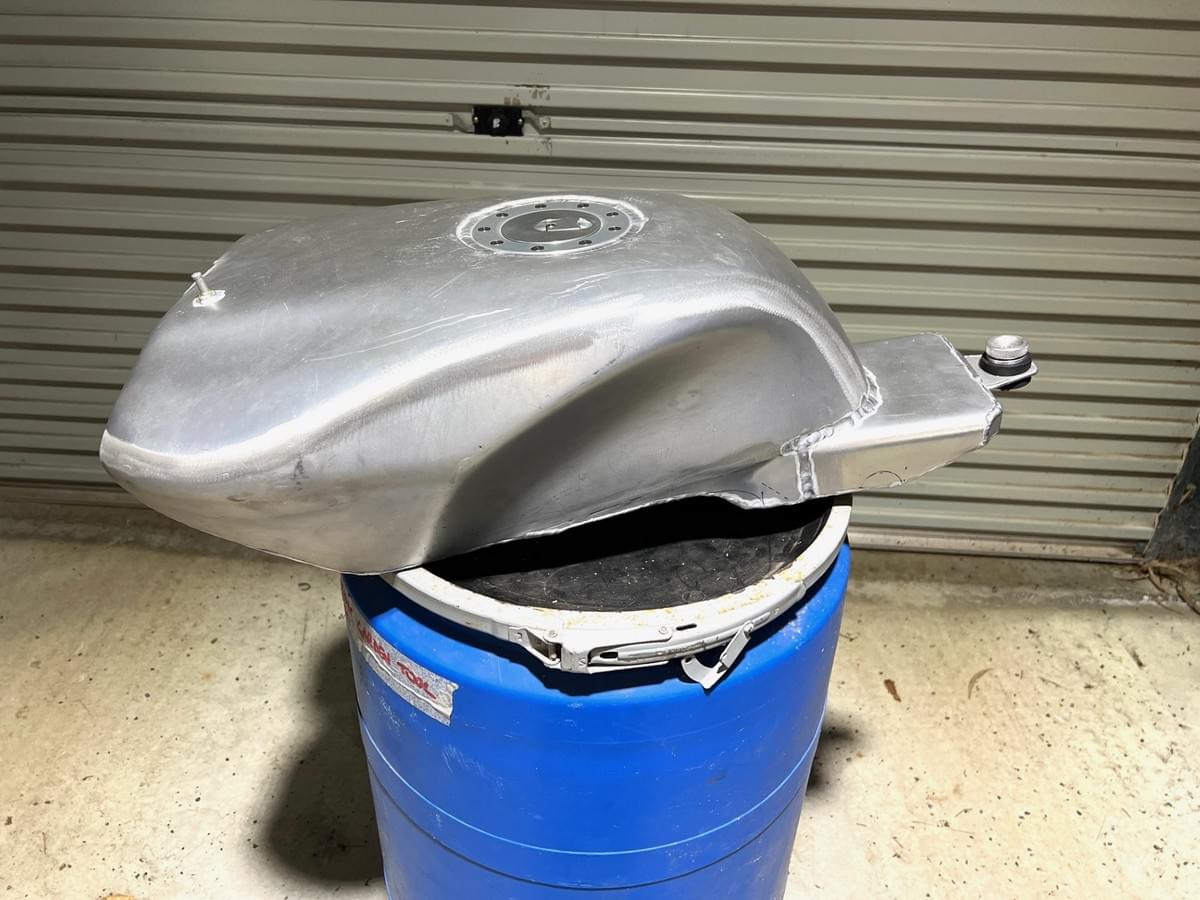
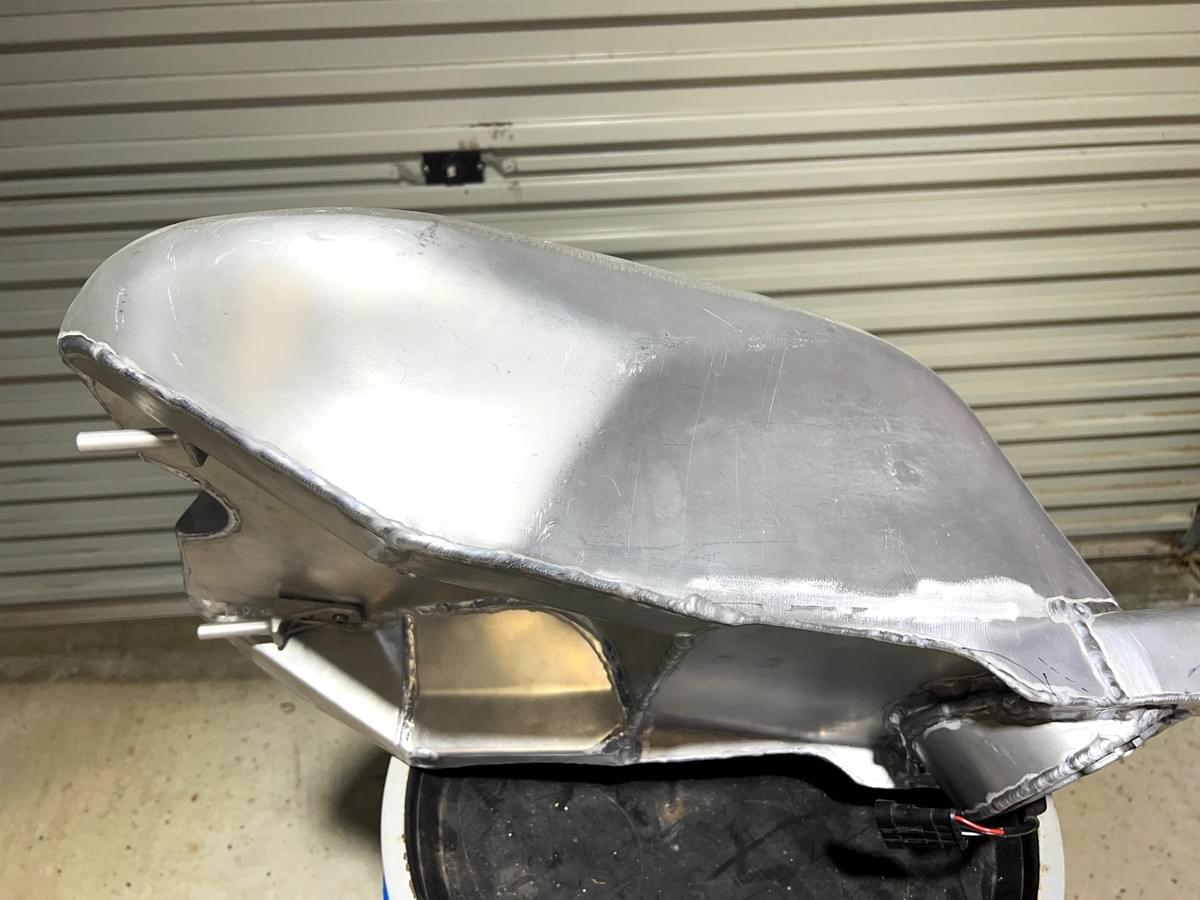
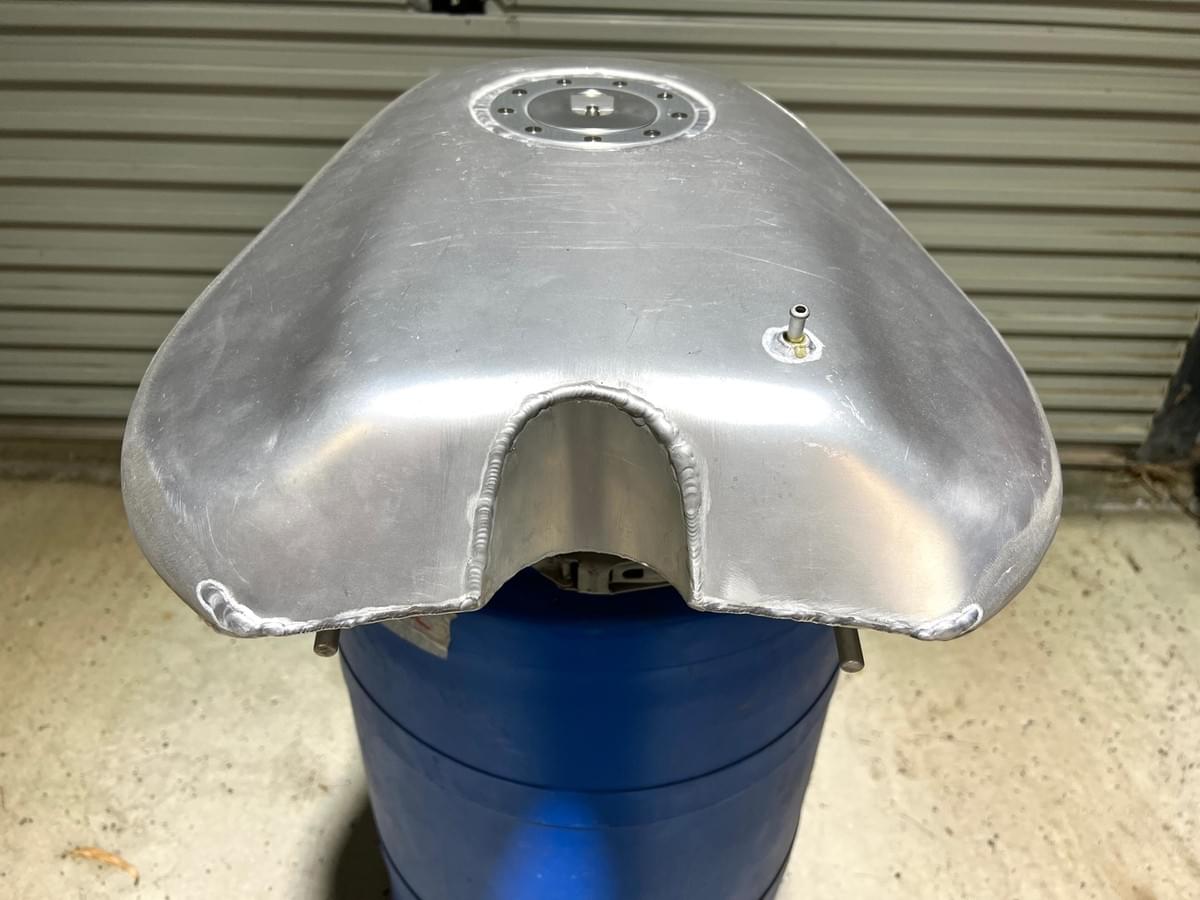
To be honest an internal battle was raging over how far to go with it. It was never going to be a “production” quality tank, it was almost "perfectly imperfect", but it just needed a lil' more….something.
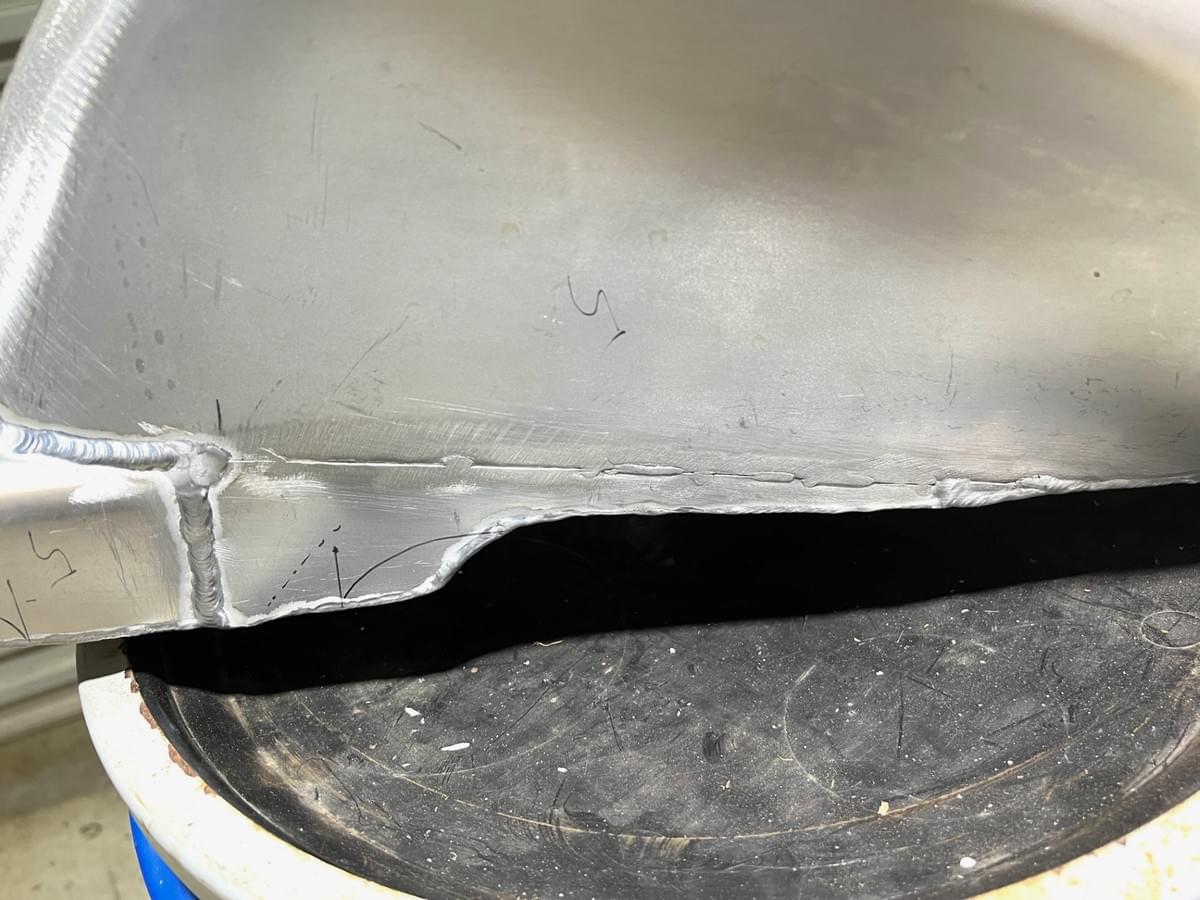
I really sweated bullets over it, particularly the side-seam where Tamburini and Terblanche meet (the earlier photo above is the good side, the other side below doesn’t meet anywhere near as well). I was just bricking it that if welded/filled along the seam it might distort as it cooled and contracted:
The thing that condensed dissatisfaction into action was catching up with a guy running a local hot-rod/custom workshop. I’d followed his great youtube channel for a while, marvelled at his insane skills, pored over several of his helpful explanations, the super-cool old skool builds and he just seemed like an all 'round nice guy. He encouraged followers to stop by and say hello....so I did.
Like a nervous kid asking for a sports-star's autograph, I put my big boy pants on and rocked up to say how much I admired his work, enjoyed his channel, and to check out an awesome build I'd followed that he had up for sale....and I took along my bunky alloy tank to get some feedback on my fears and how far to go with it.
It’s a small town, foolish me, I assumed just a smidge of interest or engagement….nope. I got some dismissive “advice” as he barely raised his head from what he was doing, and 5 minutes later I walked out feeling pretty much like shit on his shoe. “Do not meet your heroes” very much applied.
Probably (definitely!) not the best time or way to attack my problem but it pissed me off just enough to mutter “Fcuk you!” and hook into it.
I welded/filled the still obvious Tamburini/Terblanche seam, too scared to even blink as it cooled, and then dressed everything as best I could. There were a few glitches, kinda expected given my only skills are brute force and ignorance, but I mostly managed to cover my tracks reasonably well. The tank has a few wiffs and hinky bits among the original contours and nothing I did looked too out of place against them so I'll take that as a win.
Unfortunately the previous fabricator had attacked the upper welded seams along the main edge contour with a super aggressive grinder/flap-disc. They'd done a good job on the overall contour…but the gouges from the coarse media were absolutely savage. Discretion being the better part of valour I felt more comfortable living with some faint vestigial marks than trying to sand the thin material any further, not knowing how much had already been removed. Repairing something that had been sanded to nothingness would mean patching/bogging/painting to get an acceptable finish, the hoped for raw alloy finish would be off the table.
Likewise the risk vs reward of trying to tidy up the weld around the filler cap had me leaving it well alone. I considered using a ball burr in a die grinder or belt finger-sander to tidy it up but it would be extremely difficult to get a uniform profile, so best to just accept the in-your-face weld, and to me it's honest to the origins of the tank so I'm good with it.
But enough yap, it’s now dressed, sanded, and scotch-brited:
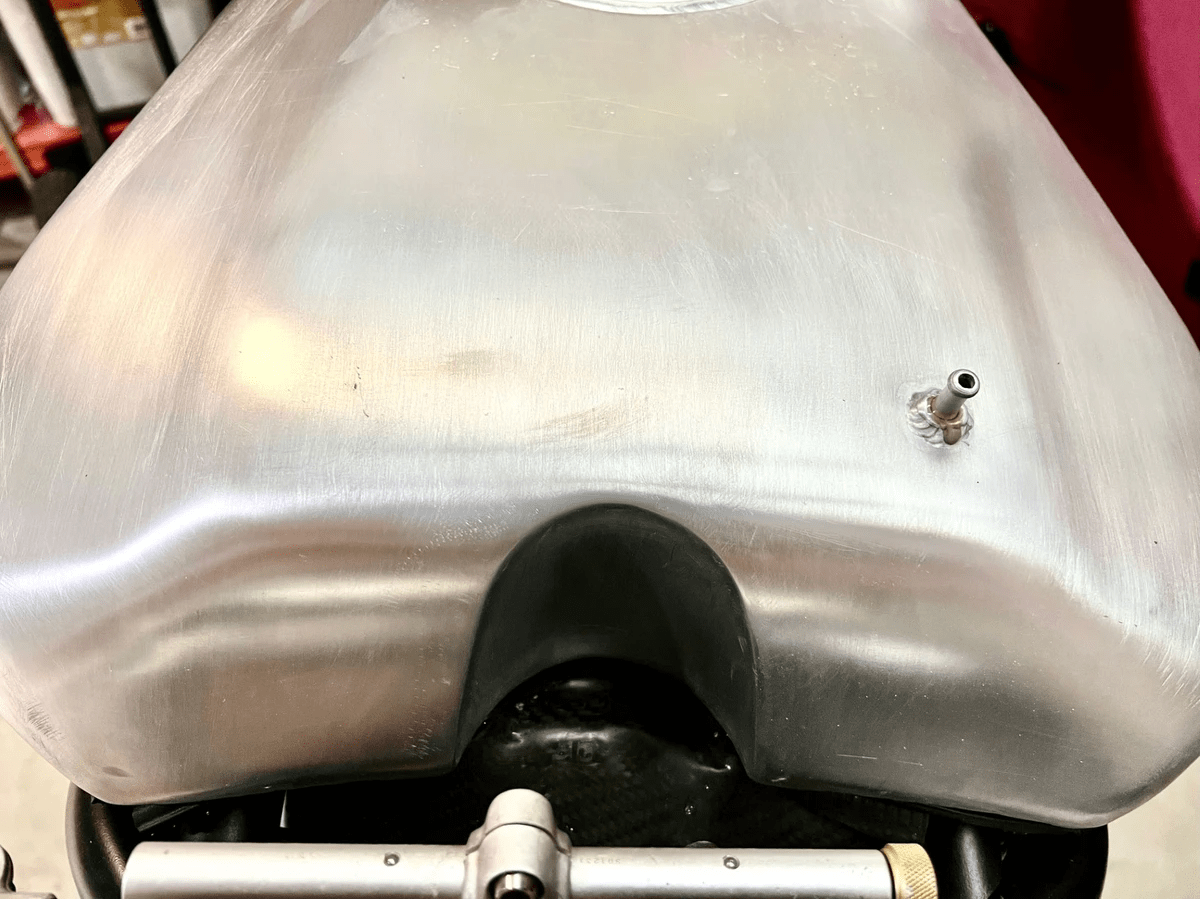
I’m happy to admit the scotch-briting was a quick 'n dirty experiment, I'm not even sure if it’s the finish I’m after (the pic above is quite dull versus reality, with the camera losing its shit over the reflective surface). I was hoping for a slightly “softer” finish, but don’t quite know how to achieve it . Bead/soda blasting? Use a finer media or brass brush? Maybe just let time do the work of softening/oxidising the brightness of freshly abraded alloy? One of the few advantages of working away from home is I'll get to look at it with fresh eyes in a couple of weeks time.
Apologies for the shed lighting, I'm halfway through installing some LED hi-bay lights, hence the weird combination of paint melting glare and dark side of the moon shadows:
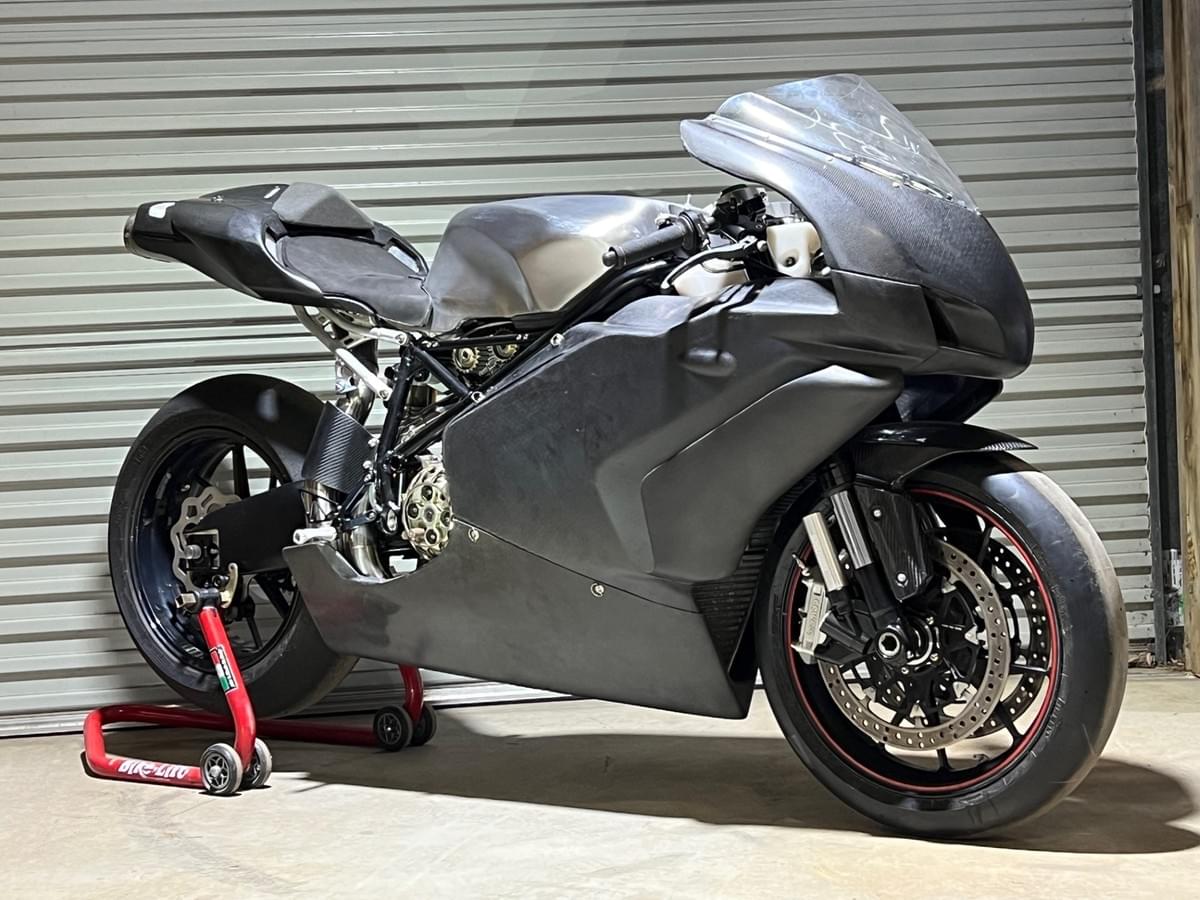
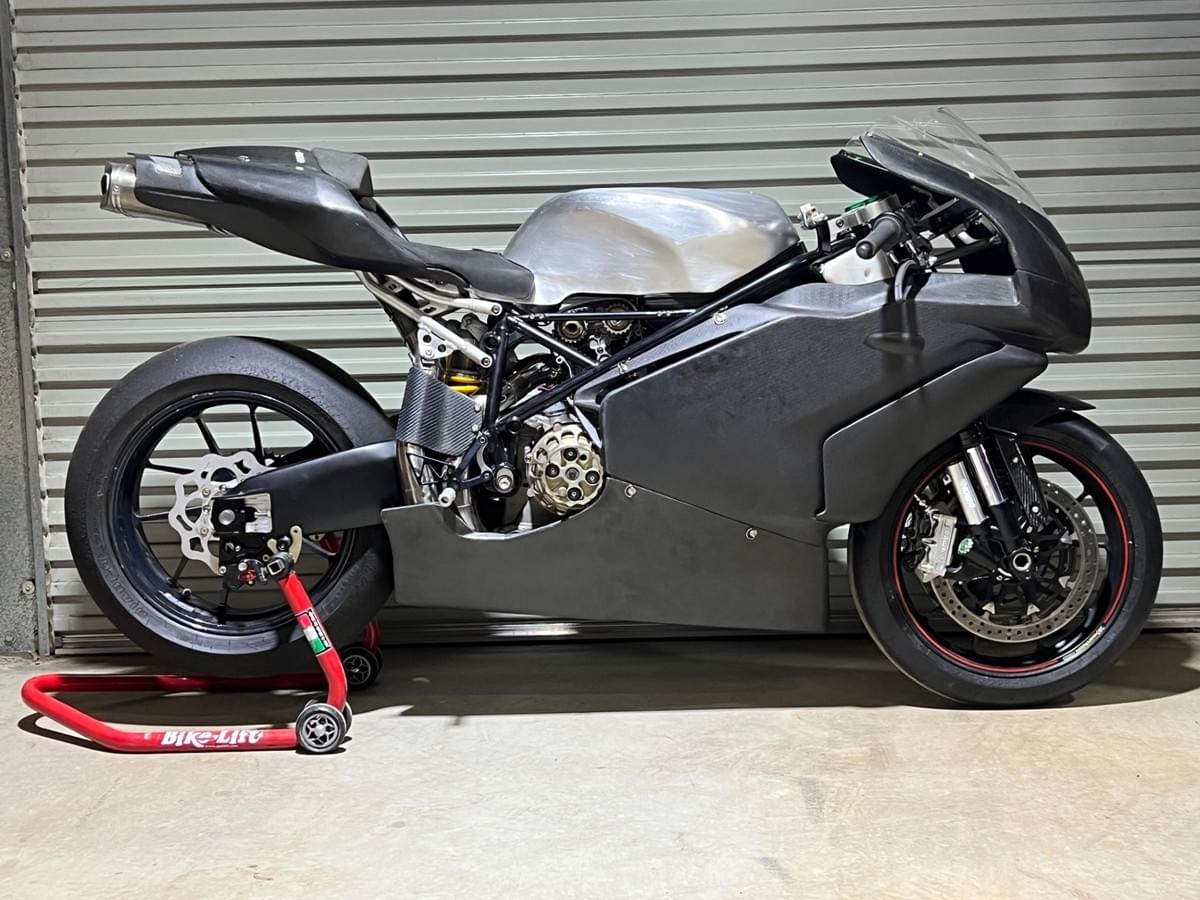
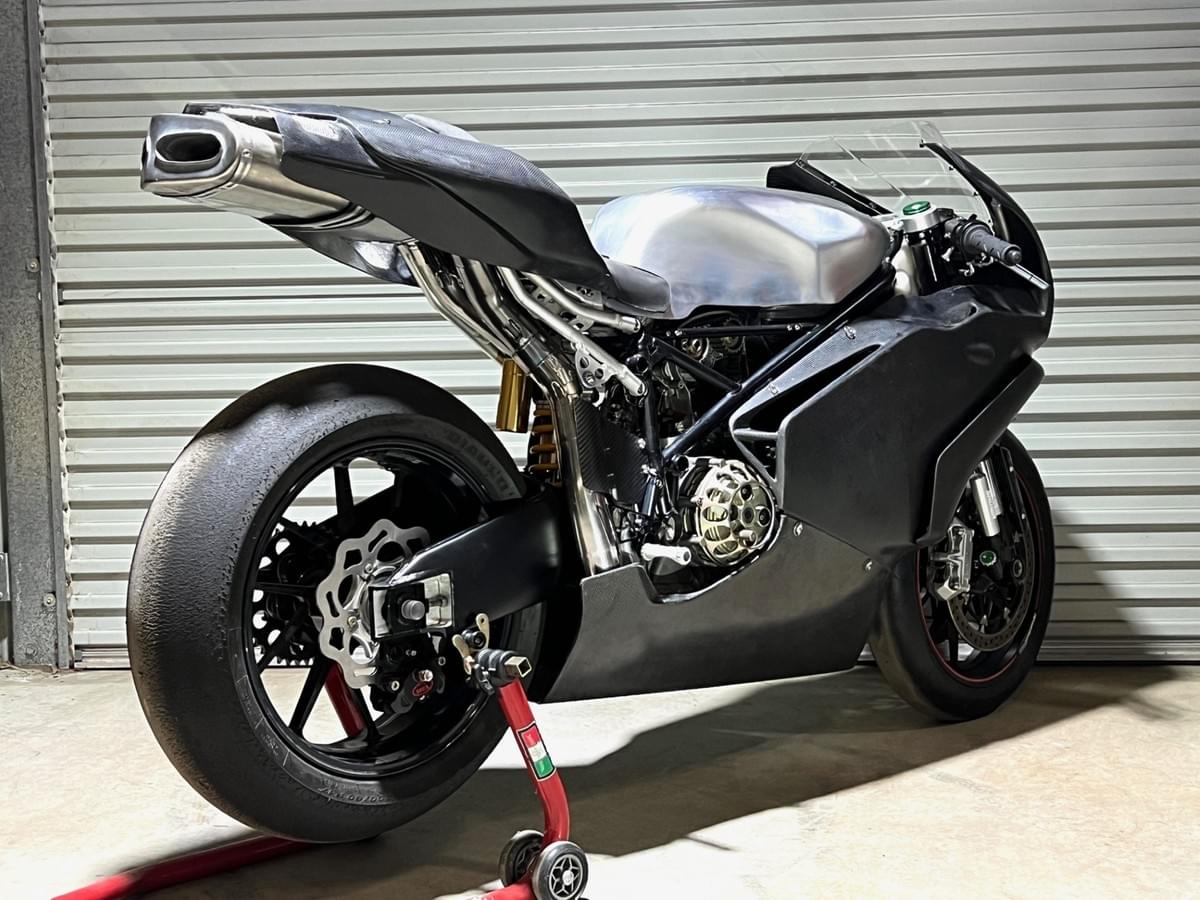
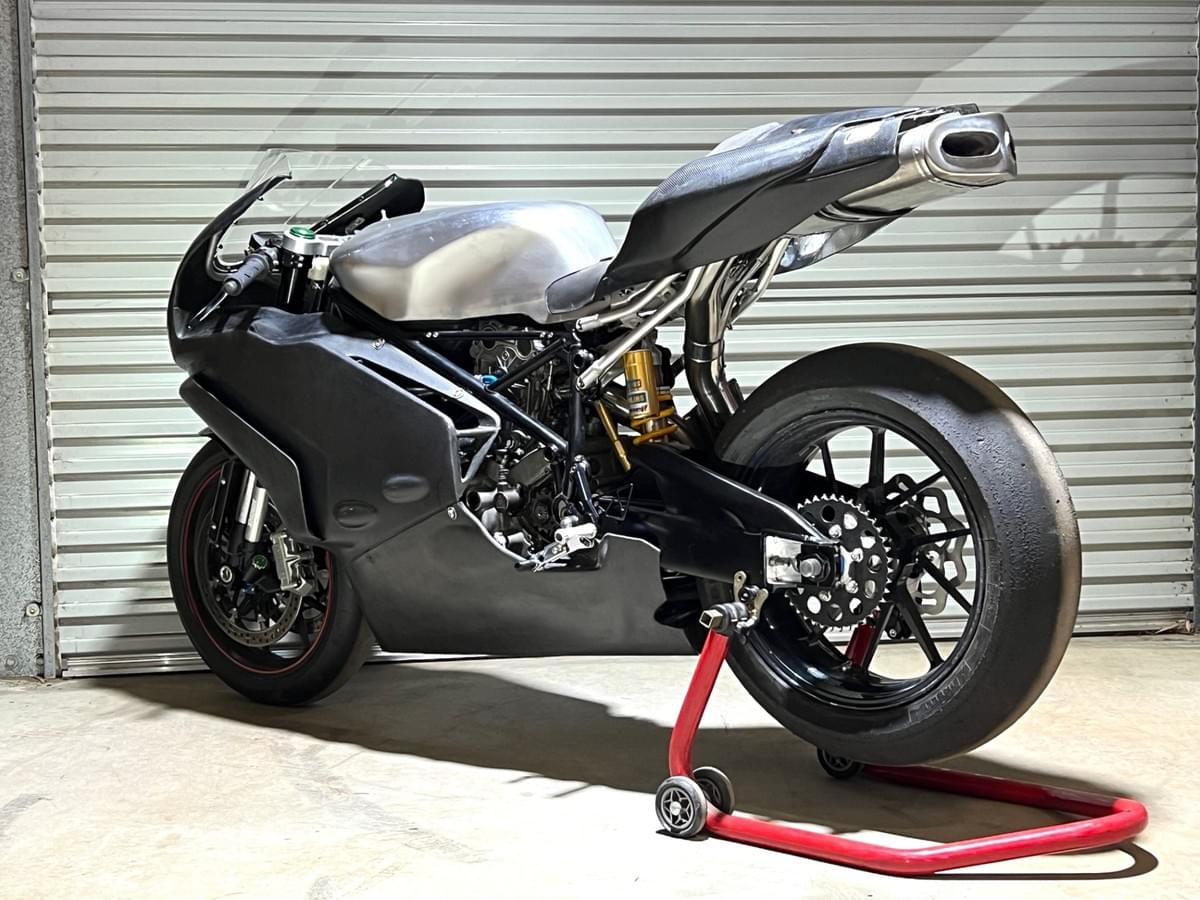
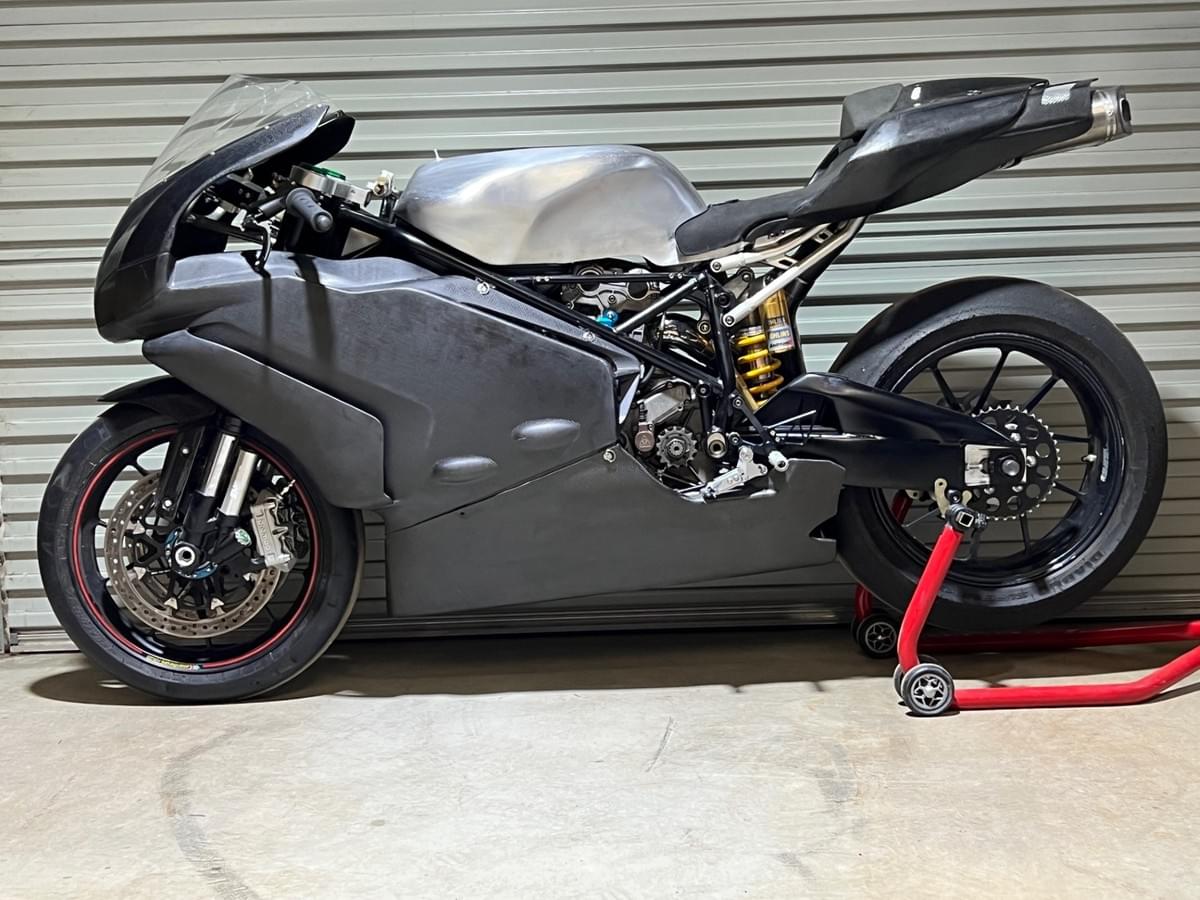
There's still a mountain of work ahead to join the dots, but it's nice to finally have the picture in my head assuming physical form.